xmlns:ig="http://schemas.infragistics.com/xaml"
このトピックでは、xamComboEditor コントロールを使用して作業を開始する方法と、プロシージャー コードを使用してそれをページに追加する方法を説明します。
Microsoft® WPF™ プロジェクトを作成します。
以下の NuGet パッケージをアプリケーションに追加します。
Infragistics.WPF.Controls.Editors.XamComboEditor
NuGet フィードのセットアップと NuGet パッケージの追加の詳細については、NuGet フィード ドキュメントを参照してください。
コード ビハインドの using/Imports ディレクティブ、およびを開始 UserControl タグ内の名前空間宣言を使って、以下を追加します。
XAML の場合:
xmlns:ig="http://schemas.infragistics.com/xaml"Visual Basic の場合:
Imports Infragistics.Controls.EditorsC# の場合:
using Infragistics.Controls.Editors;xamComboEditor コントロールを LayoutRoot という名前の Grid コンテナーに追加します。
xamComboЕditor コントロールの ItemsSource プロパティを Product オブジェクトの ObservableCollection に設定します。
DisplayMemberPath プロパティを設定します。xamComboEditor 項目ドロップダウン リストに視覚的に表示されるビジネス オブジェクトのデータ プロパティにパスを指定します。
項目が選択されていない時に表示されるテキストを指定するために EmptyText プロパティを設定します。
IsEditable プロパティを false に設定して、読み取り専用の xamComboEditor を作成します。デフォルトで、コントロールは編集可能であり、このプロパティは True に設定されます。
xamComboEditor コントロールの Height プロパティと Width プロパティを設定します。
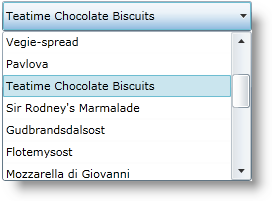
MaxDropDownHeight プロパティを設定します。このプロパティは、xamComboEditor ドロップダウン リストの高さを制限します。そうでない場合、コントロールの上下の使用可能なスペースが測定されます。デフォルトで、コントロールの下にリストが表示されます。下に十分なスペースがない場合、リストはコントロールの上に表示されます。ドロップダウン リストは WPF アプリケーションの使用可能な高さ内に制限されます。
DropDownButtonDisplayMode プロパティを設定します。このプロパティはドロップダウン ボタンの表示状態を構成します。オプションは Always (デフォルト値)、MouseOver、Focused、Never です。
新しく作成されたコントロールを Grid コンテナーの子として追加します。
XAML の場合:
<UserControl.Resources>
    <local:DataUtil x:Key="DataUtil" />
</UserControl.Resources>
<Grid x:Name="LayoutRoot">
<ig:XamComboEditor
    ItemsSource="{Binding Source={StaticResource DataUtil}, Path=Products}"
    DisplayMemberPath="ProductName"
    EmptyText="Choose Product ..."
    IsEditable="False"
    Height="30" Width="250"
    MaxDropDownHeight="150" />
</Grid>
InitializeComponent メソッド後のページ コンストラクターに xamComboEditor コントロールのインスタンスを作成します。
Visual Basic の場合:
Dim xamComboEditor As New XamComboEditor()
xamComboEditor.ItemsSource = DataUtil.Products
xamComboEditor.DisplayMemberPath = "ProductName"
xamComboEditor.EmptyText = "Choose Product ..."
xamComboEditor.IsEditable = False
xamComboEditor.Height = 30
xamComboEditor.Width = 250
xamComboEditor.MaxDropDownHeight = 150
LayoutRoot.Children.Add(xamComboEditor)
C# の場合:
XamComboEditor xamComboEditor = new XamComboEditor();
xamComboEditor.ItemsSource = DataUtil.Products;
xamComboEditor.DisplayMemberPath = "ProductName";
xamComboEditor.EmptyText = "Choose Product ...";
xamComboEditor.IsEditable = false;
xamComboEditor.Height = 30;
xamComboEditor.Width = 250;
xamComboEditor.MaxDropDownHeight = 150;
LayoutRoot.Children.Add(xamComboEditor);
WPF アプリケーションを保存して実行します。