
仮想化されたデータグリッドによる高速レンダリング
紹介
XamarinデータグリッドのUltimate UIコントロールは、仮想レンダリング機能を使用して、無制限のデータ(行または列)を処理できます。これにより、最速のレンダリング、スムーズなタッチ操作、カスタマイズされた列と行の操作が可能になります。このレッスンでは、OData サービスに接続されたデータ グリッドを設定するコードを確認し、iOS と Android でのグリッドの驚異的なパフォーマンスを体験します。
数行のサンプル コードで、Northwind サービスから一般公開されているデータ ソースに接続できます。XamDataGrid を使用して、使用可能なデータ ソース (この例では OData サービス) にバインドし、ハイパフォーマンス データ グリッドにデータを表示できます。
レッスンの目的
このレッスンの最後には、OData データ ソースを使用した高パフォーマンスのグリッドを作成できます。これを行うために実行する主な手順は次のとおりです。
- プロジェクトを設定する
- データソースの定義
- ソースをビューにバインドする
- ソリューションをテストする
このレッスンで使用するコントロールの詳細については、「Xamarin Data Grid コントロール」ページを参照してください。
ステップ 1: プロジェクトの設定
このレッスンで使用したプロジェクトは、ここをクリックしてダウンロードできます。
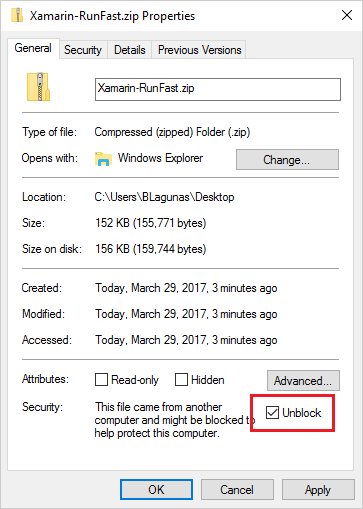
次に、解凍後に初めてプロジェクトを実行するには、ソリューション全体を Visual Studio に読み込み、ソリューションを右クリックして [パッケージの復元] を選択します。
それが完了したら、ポータブル クラス ライブラリと Android プロジェクトの両方への参照を追加してDataSource.DataProviders.OData.Core.dll。このファイルは、ZIP ダウンロードの一部である OtherDependencies フォルダーにあります。これを行うには、プロジェクトの Reference フォルダーを右クリックし、OtherDependencies フォルダーを参照して、DataSource.DataProviders.OData.Core.dllを選択します。
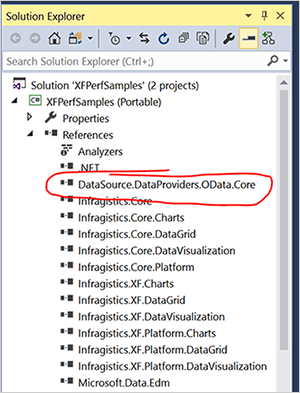
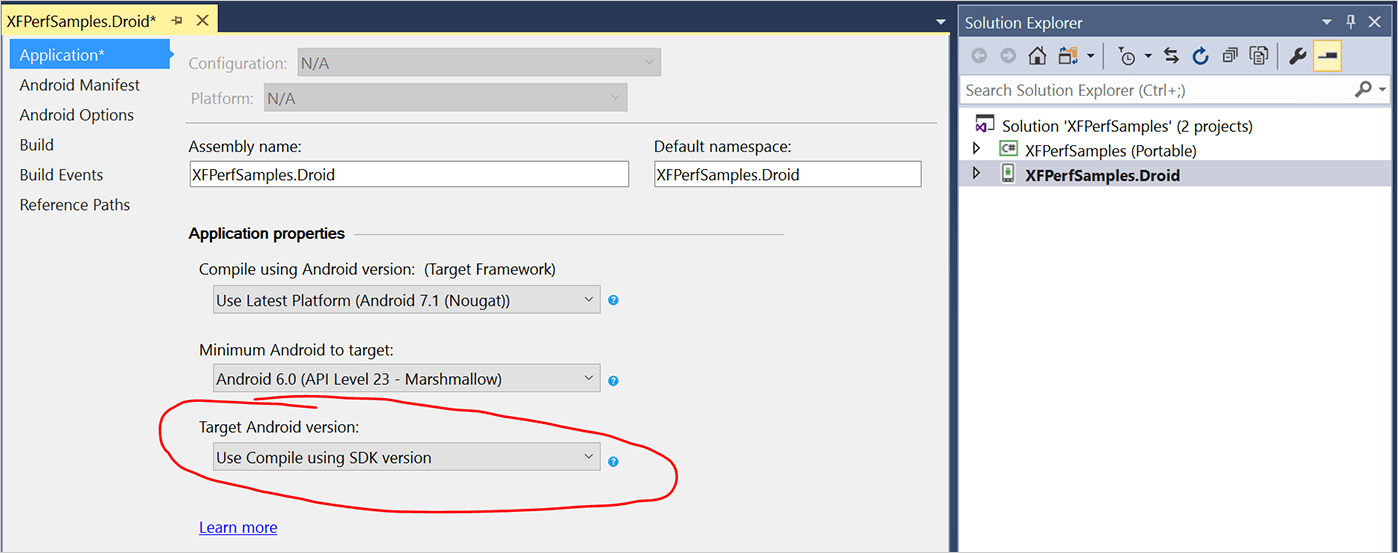
これは、ソリューション内の両方のプロジェクトに対して行います。次に、最後に、[Target Android Version] が [Use Compile using SDK version] に設定されていることを確認します。この設定は、Android プロジェクトを右クリックして [Properties] を選択すると確認できます。
ステップ 2データソースの定義
次に、Northwind サービス データ ソースを GridRemoteDataViewModel にバインドします。XFPerfSamples プロジェクトで [ViewModels] を展開し、GridRemoteDataViewModel.csソース ファイルを開きます。
サンプル プロジェクトでは、GridRemoteDataViewModel が既に作成され、データ ソースが OData として定義されています。ソースに、次のコード セグメントを追加してデータ ソースを定義します。
BaseUri="http://services.odata.org/V4/Northwind/Northwind.svc",
EntitySet="Orders",
PageSizeRequested=25,
MaxCachedPages=5BaseUriは、Northwind サーバーを OData ソースとして定義します。Northwind サービスから、EntitySet はサービスから取得するデータを定義します。PageSizeRequestedは、ページが要求されるたびに返されるページあたりの項目数です。MaxCachedPages は、要求後にキャッシュされるページの数です。

データ ソースを定義したら、次の手順では、そのソースをビューにバインドします。
ステップ 3データソースのバインド
ソースを定義したら、ソースをビューにバインドする必要があります。Visual Studio プロジェクトで [ビュー] を展開し、GridRemoteData.xamlファイルを開きます。には、Infragistics データ グリッドの名前空間が必要です。Infragistics Toolbox を使用すると、必要なコードの開発を自動化できます。このレッスンでは、コードを手動で記述します。
<igDataGrid:XamDataGrid x:Name="grid1" ItemSource="{Binding DataSource}" AutoGenerateColumns="False">
  <igDataGrid:XamDataGrid.Columns>
    <igDataGrid:TextColumn PropertyPath="OrderID" HeaderText="Order ID"/>
    <igDataGrid:TextColumn PropertyPath="CustomerID" HeaderText="Customer ID"/>
    <igDataGrid:TextColumn PropertyPath="ShipName" HeaderText="Ship Name" />
    <igDataGrid:TextColumn PropertyPath="ShipCity" HeaderText="Ship City" />
  </igDataGrid:XamDataGrid.Columns>
</igDataGrid:XamDataGrid>この例では、AutoGenerateColumnsプロパティを false に設定します。プロパティを True に設定すると、データ ソースが検査され、必要な列が作成されます。これは、使用されているデータセットによっては、モバイルアプリでいくつかの問題を引き起こす可能性があります。上記のコード セグメントでは、列をTextColumnsとして手動で指定しています。

ステップ 4ソリューションをテストする
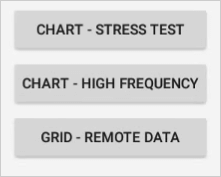
データ ソースとバインディングを構成したら、エミュレータまたは物理ハードウェア デバイスでソリューションをテストできます。この病変については、Android 6.0 エミュレーターを使用してテストします。これにより、アプリケーションがコンパイルされ、APK がビルドされ、パッケージがエミュレータまたはデバイスにデプロイされます。デバッガーは Visual Studio のバックグラウンドで起動し、アプリを操作できるようになります。アプリから、[グリッド] – [リモートデータ] をクリックします。
デバイスまたはエミュレータによっては、グリッドはソース データを読み込むため、最初は空白になります。データは、ロード後、およびスクロールすると、グリッドに入力されます。マウスまたは指でスクロールして複数のページを読み込み、グリッドをテストします。データがロードされるように供給されていない場合は、データがロードされている間、インターフェイス内に一時的なセルが表示されます。
結論
XamDataGrid は、モバイル アプリXamarinさまざまな種類のデータ ソースで使用されます。これにより、選択したデータソースを使用して高パフォーマンスのデータグリッドを作成できるため、エンドユーザーのエクスペリエンスがシームレスに向上します。