パフォーマンスを最適化するためのストレステストレンダリング
多くの金融および医療アプリケーションでは、ほぼリアルタイムのデータを使用して複数のチャートを 1 つの画面にレンダリングすることが標準的な方法です。UI ツールが、これらの高ストレス データ シナリオ (複数のグラフが目で見る限りの速さでデータを更新する) の要求に対応できることを確認する必要があります。このレッスンでは、Infragistics Ultimate UI for Xamarinデータ チャートが標準的なタブレットやスマートフォンでこのレベルのストレスの下でどのように機能するか、およびチャートを微調整してパフォーマンスを最適化する方法を確認します。
このレッスンでは、1 つのビューで複数のグラフを使用してストレス テストを実行します。1 つのビューで 3 つの異なるデータ ソースを使用する 3 つの異なるグラフを作成します。ソリューションをデプロイすると、グラフは数千のデータ ポイントを持つ高フレームレートで動作することがわかります。
レッスンの目的
このレッスンでは、1 つのビューで複数のグラフを使用してストレス テストを実行します。1 つのビューで 3 つの異なるデータ ソースを使用する 3 つの異なるグラフを作成します。ソリューションをデプロイすると、グラフは数千のデータ ポイントを持つ高フレームレートで動作することがわかります。
これを行うために実行する手順は次のとおりです。
- データソースの定義
- 1 つのグラフを作成する
- ソリューションをテストする
- ソリューションにグラフを追加する
- ソリューションを再テストする
このレッスンで使用するコントロールの詳細については、「Xamarinデータ チャートコントロール」ページを参照してください。
ステップ 1: プロジェクトの設定
このレッスンで使用したプロジェクトは、ここをクリックしてダウンロードできます。
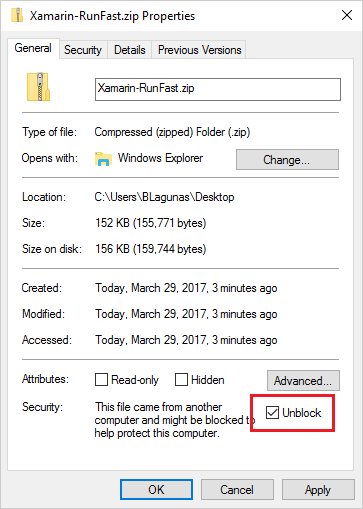
次に、解凍後に初めてプロジェクトを実行するには、ソリューション全体を Visual Studio に読み込み、ソリューションを右クリックして [パッケージの復元] を選択します。
それが完了したら、ポータブル クラス ライブラリと Android プロジェクトの両方への参照を追加してDataSource.DataProviders.OData.Core.dll。このファイルは、ZIP ダウンロードの一部である OtherDependencies フォルダーにあります。これを行うには、プロジェクトの Reference フォルダーを右クリックし、OtherDependencies フォルダーを参照して、DataSource.DataProviders.OData.Core.dllを選択します。
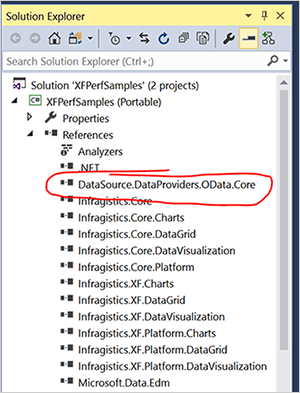
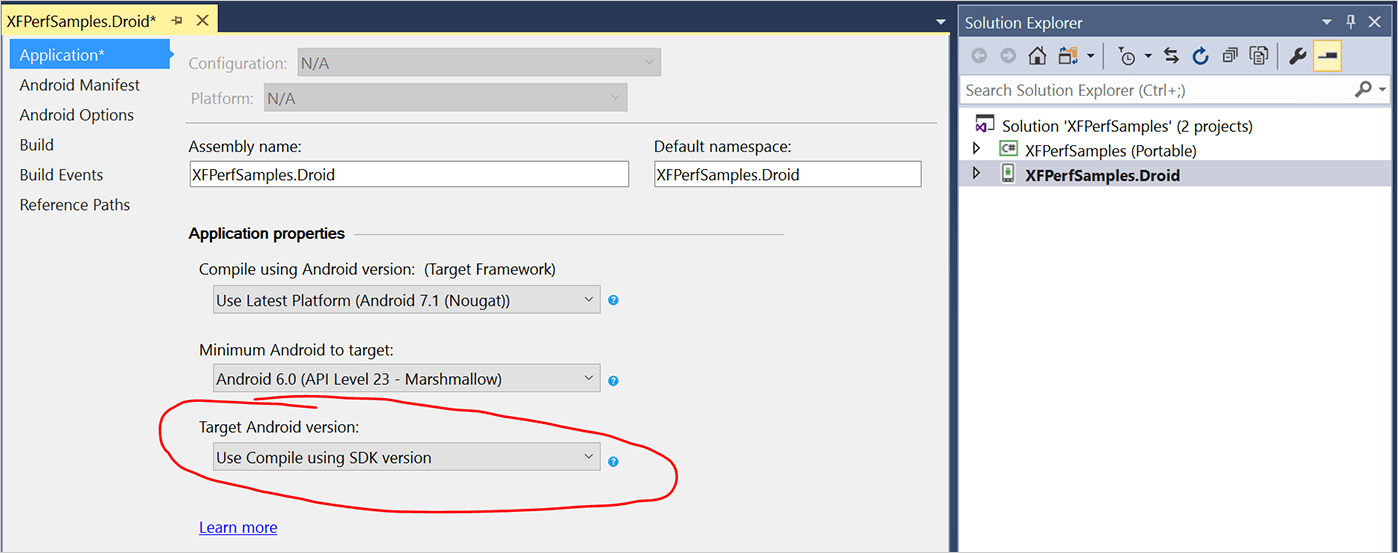
これは、ソリューション内の両方のプロジェクトに対して行います。次に、最後に、[Target Android Version] が [Use Compile using SDK version] に設定されていることを確認します。この設定は、Android プロジェクトを右クリックして [Properties] を選択すると確認できます。
ステップ 2 1 つのグラフを作成する
最初の手順は、ビューにあるChartStressTest.xamlファイルを開くことです。このファイルには、Infragistics Charts 名前空間の定義済みコードと、行と列の定義を含むグリッドが含まれています。このサンプルでは、アプリで使用されるデータの量を測定します。また、Infragistics Toolbox を使用して、XAML でグラフの要件をドラッグ アンド ドロップすることでもこれを行うことができます。
グリッドに、次のコード セグメントを挿入してカテゴリ グラフを定義します。
<igCharts:XamCategoryChart x:Name="chart1" Title="Chart1" ItemSource="{Binding Path=Data}" MarkerTypes="None" Grid.Row="0"> </igCharts:XamCategoryChart> <Label Text="{Binding Path=FpsText}" Grid.Row="1" />このコード セグメントは、指定したデータ ソースを使用してグラフを作成します。デフォルトでは、マーカーは有効になっており、このコード・セグメントはマーカーを無効にします。また、FpsText データを使用してラベルを作成し、1 秒あたりのフレーム数 (fps) をテストします。

ステップ 3ソリューションをテストする
チャートを構成したら、エミュレータまたは物理ハードウェア デバイスでソリューションをテストできます。この病変については、Android 6.0 エミュレーターを使用してテストします。これにより、アプリケーションがコンパイルされ、APK がビルドされ、パッケージがエミュレータまたはデバイスにデプロイされます。デバッガーは Visual Studio のバックグラウンドで起動し、アプリを操作できるようになります。アプリから、[チャート] – [ストレステスト]をクリックします。
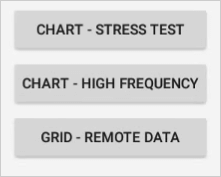
折れ線グラフが生成されます。フレーム/秒(fps)と量フィールドは下部で更新されます。この例では、シリーズごとに約 1,000 個のデータ ポイントが使用されており、グラフは 40 fps 以上で表示されています。
ステップ 4ソリューションへのグラフの追加
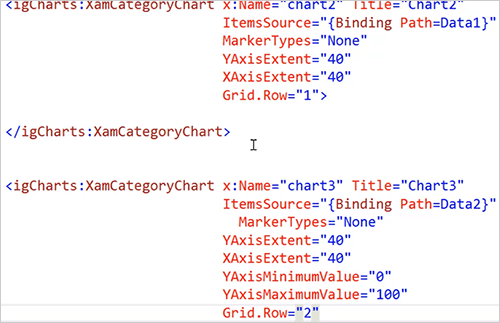
ストレス テストの機能を示すために、アプリの追加のグラフにプロパティを段階的に追加します。chart1 の後に次のコード セグメントを追加します。
<igCharts:XamCategoryChart x:Name="chart2" Title="Chart2" ItemSource="{Binding Path=Data1}" MarkerTypes="None" YAxisExtent="40" XAxisExtent="40" Grid.Row="1"> </igCharts:XamCategoryChart> <igCharts:XamCategoryChart x:Name="chart2" Title="Chart2" ItemSource="{Binding Path=Data1}" MarkerTypes="None" YAxisExtent="40" XAxisExtent="40" YAxisMinimumValue="0" YXaisMaximumValue="100" Grid.Row="2"> </igCharts:XamCategoryChart> <Label Text="{Binding Path=FpsText}" Grid.Row="3" />上記のコード セグメントは、ビューに 2 つのグラフを追加し、Y 軸と X 軸の既定値を定義します。3 番目のグラフでは、グラフの Y 軸の既定値も定義されているため、グラフが実行時に実行する必要がある作業量が最小限に抑えられます。また、3行目に表示されるようにラベルテキストプロパティを変更する必要があります。
ステップ 5ソリューションの再テスト
ソリューションをエミュレーターまたはデバイスにデプロイして、新しく作成されたグラフを表示します。最初の 2 つのグラフでは、ソース内のデータに対して可変の Y 軸が作成され、3 番目のグラフは定義されたプロパティから自動的に 100 に設定されていることに注意してください。チャートが読み込まれると、ポートレートモードとランドスケープモードのどちらを使用しているかに関係なく、1秒あたりのフレーム数の平均は約25〜30フレームになります。

結論
XamCategoryChart を使用すると、パフォーマンスを犠牲にすることなく、複数のデータ ソースを持つ複数のグラフを 1 つのビューで使用できます。
