Infragistics Toolboxで高速に書く
紹介
XamarinのUltimate UIコントロールには、Infragistics Toolbox が含まれています。このツールボックスを使用すると、コントロールをコードにドラッグ アンド ドロップし、コンフィギュレーターを使用して、コードを 1 行も書かずにコンポーネントをカスタマイズできます。このレッスンでは、Infragistics Toolbox の使用方法を実演します。
レッスンの目的
このレッスンを修了すると、Infragistics Toolbox を使用して、コードを書かずにコンポーネントを簡単に開発する方法を理解できるようになります。
- プロジェクトを設定する
- ツールボックスから XAML を追加する
- Infragistics コントロールを使用する
このレッスンで使用するコントロールの詳細については、「Xamarinラジアル ゲージコントロール」ページおよび「Xamarin円チャートコントロール」ページを参照してください。
重要: 始める前に
Infragistics Toolbox が正しく機能するには、Visual Studio 拡張機能 "NuGet Package Manager for Visual Studio 2015" v3.5.0.1996 以降がインストールされている必要があります。Visual Studio ギャラリーの最新バージョンは v3.4.4 であり、Microsoft は v3.4.4 から v3.5.0.1996 への自動更新を有効にしていないため、このパッケージを手動で更新する必要があります。

最新バージョンに更新するには、次の手順を実行します。
- Visual Studio のすべてのインスタンスを閉じます。
- 最新の NuGet ツールをダウンロードする
注: まれに、Infragistics コントロールがツールボックスに表示されないことがあります。[ツールボックス] ウィンドウの下部にある [更新] ボタンをクリックすると、現在のプロジェクトの NuGet パッケージに存在するすべての Infragistics コントロールがツールボックスに追加されます。
ステップ 1プロジェクトの設定
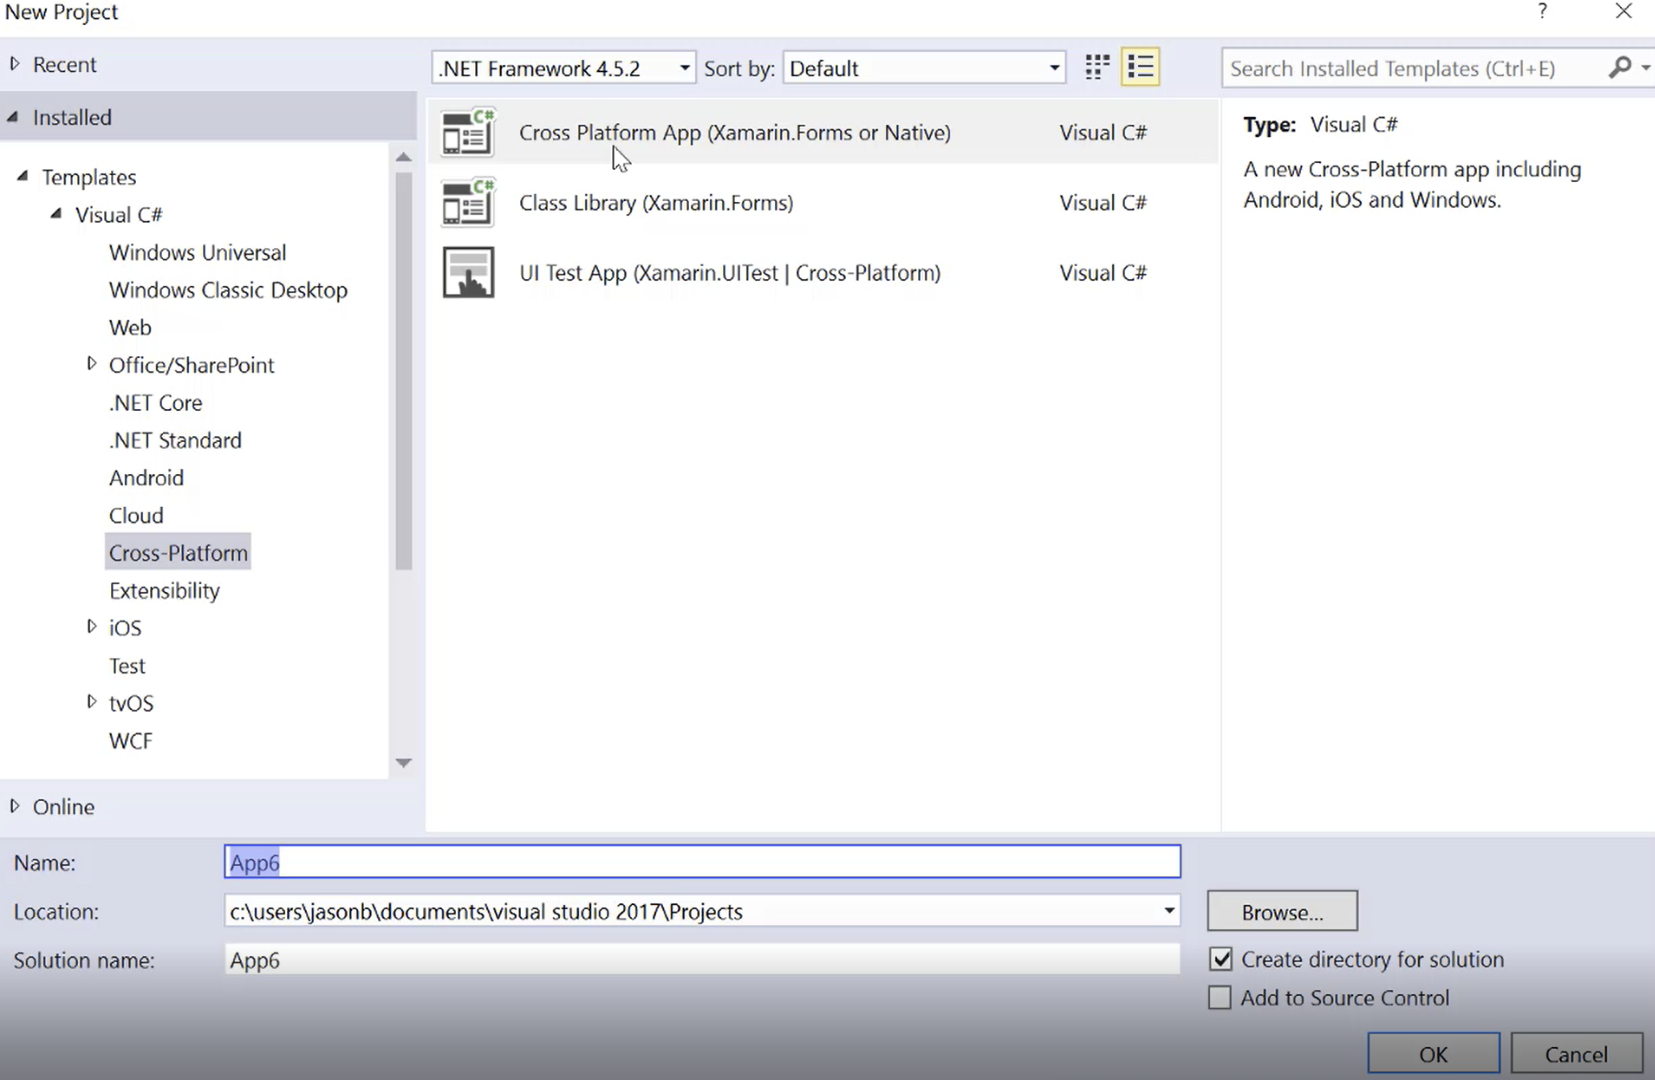
Visual Studio を開き、新しいプロジェクトを作成します。プロジェクトを作成するときは、[クロス プラットフォーム アプリ (Xamarin.Forms またはネイティブ)]を選択します。この例では、プロジェクトに App6 という名前を付けます。また、ポータル クラス ライブラリを持つ空白のアプリを使用して指定する必要があります。
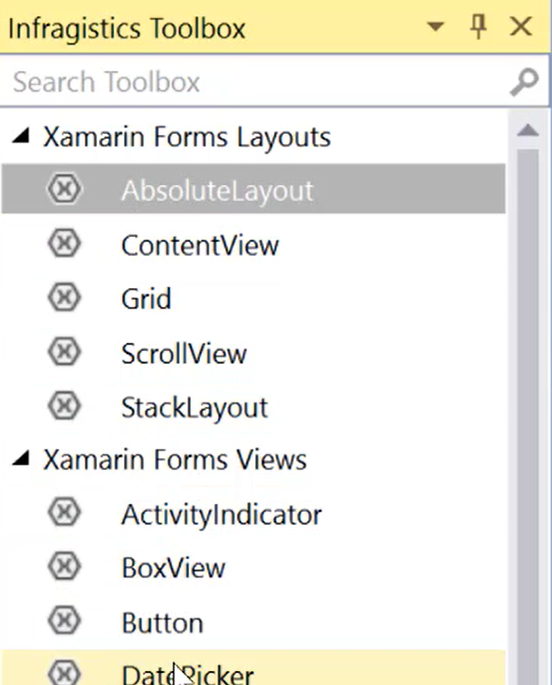
Infragistics Toolbox を開くには、[表示] をクリックし、[その他のウィンドウ] を強調表示して、[Infragistics Toolbox]をクリックします。
ステップ 2ツールボックスからの XAML の追加
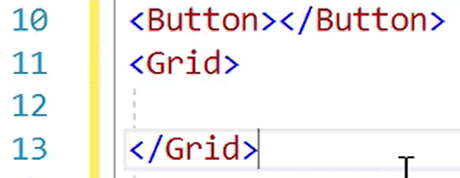
ツールボックスの機能を示すには、ソリューションで MainPage.xaml ファイルを開きます。ツールボックスを開いた状態で、ツールボックスから Xamarin.Forms ビューを XAML の空白行にドラッグ アンド ドロップします。コードのタグが自動的に入力されることに注意してください。
次に、Ctrlキーを押しながら別の要素をドラッグします。タグが表示されるだけでなく、共通プロパティにもデフォルト値が設定されます。
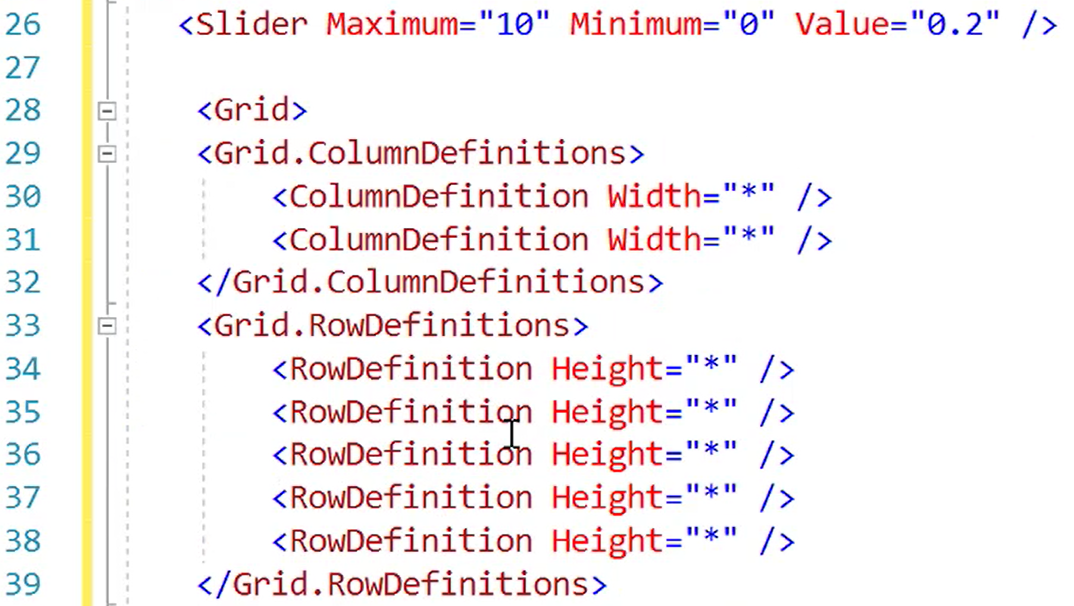
これにより、コードを書かずに、アプリ内のコンポーネントをすばやく簡単にビルドできます。ツールボックスからいくつかのコード例をドラッグした後、追加したコード行を削除して既定の MainPage.xaml ファイルに戻します。
ステップ 3 Infragistics コントロールの使用
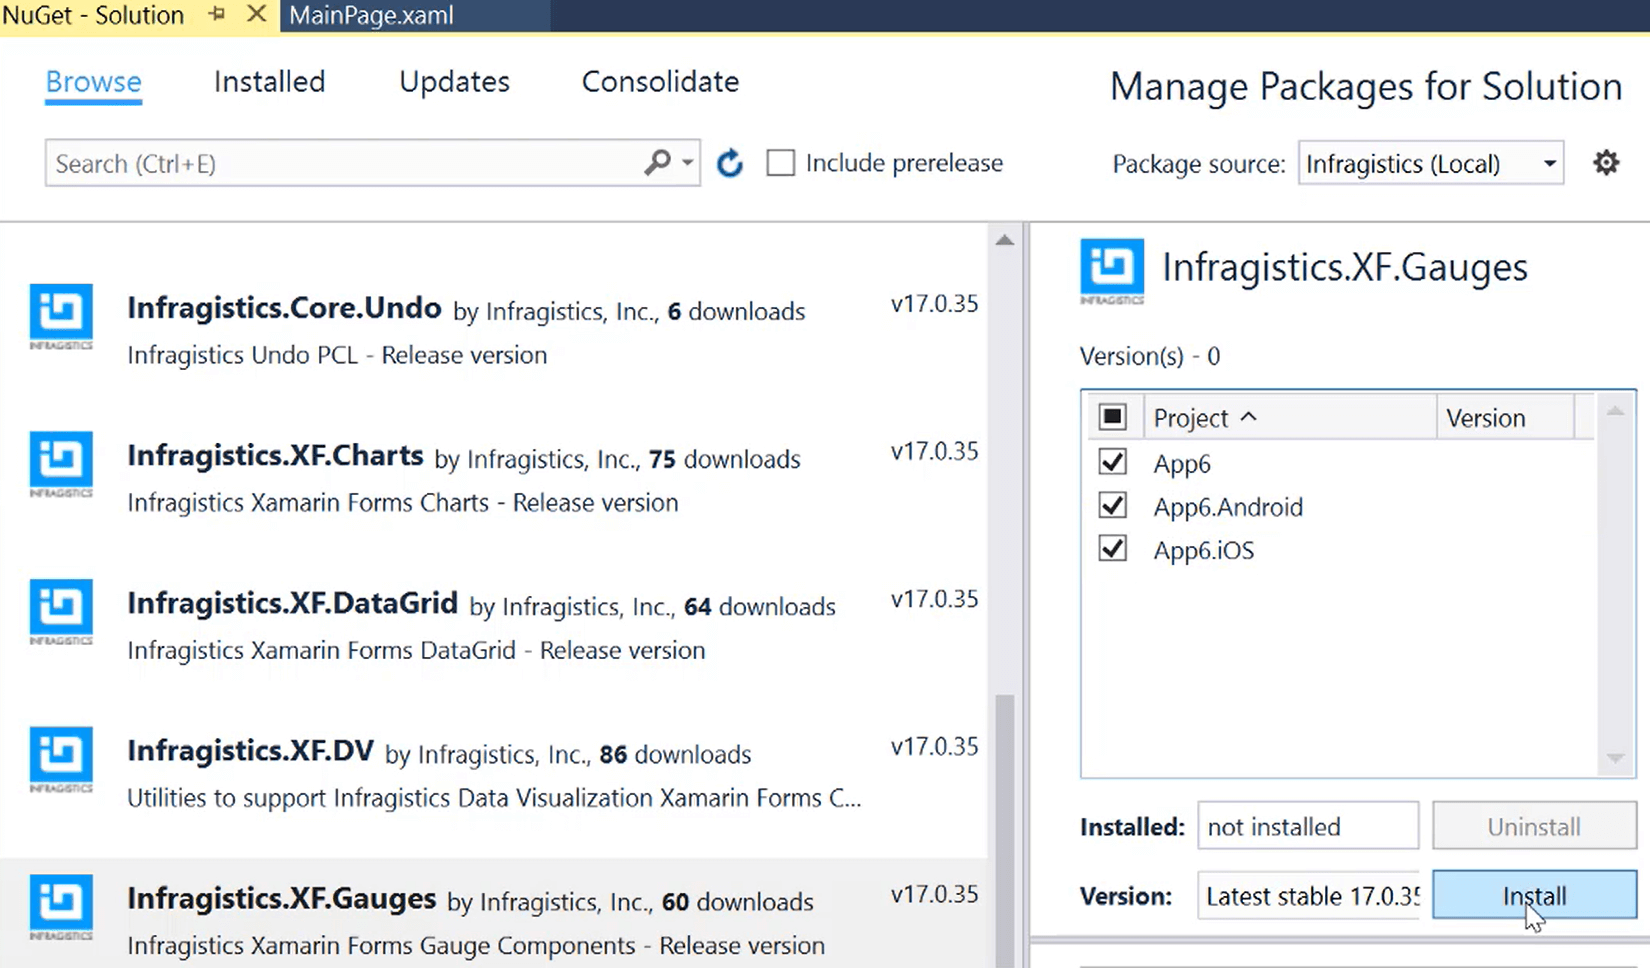
次に、Infragistics コントロールをソリューションに追加します。プロジェクトを右クリックし、[ソリューションの NuGet パッケージの管理] をクリックします。パッケージのソースをInfragistics (ローカル)に変更します。[参照] タブで、Infragistrics.XF.Gaugesパッケージを選択します。Android アプリのパッケージを指定し、パッケージを追加します。
パッケージがソリューションに追加されると、Infragistics ツールボックスが Xamarin.Forms コントロールで更新されます。これらは、ドラッグ アンド ドロップして、何も書かずに完全に構成された XAML コードを作成できる追加のコンポーネントです。
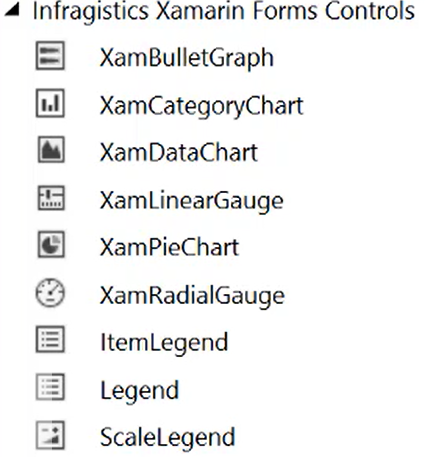
ツールボックスを使用してコンポーネントを追加するもう 1 つの機能は、コンポーネントを XAML 画面にドラッグするときに、コンポーネントに必要な名前空間も追加されることです。たとえば、XamRadialGauge コントロールをドラッグ アンド ドロップすると、ゲージの XAML が入力されるだけでなく、ContentPage 要素に Infragistics 名前空間も作成されます。

必要な名前空間は、ドラッグ アンド ドロップしたコントロールに基づいて自動的に作成されます。XamPieChart コントロールを XAML に追加して、名前空間の変更を確認します。

結論
Infragistics Toolbox は、世界初の NuGet 搭載ツールボックスを使用して、視覚要素を作成するために使用されます。このツールボックスを使用すると、要素を XAML コードにドラッグ アンド ドロップするだけで、空白のコンポーネントまたは事前設定されたコンポーネントを作成できます。これらのコントロールは、Infragistics Ultimate UI for Xamarinで使用できます。
