AppMapで高速に書く
紹介
XamarinのUltimate UIコントロールには AppMap が含まれており、必要なコードを生成しながら WYSIWYG 形式で UI を視覚的にレイアウトできます。AppMap によって作成されたすべてのコードは、ナビゲーションを含め、モバイル アプリのベスト プラクティス PRISM コードに従っています。
レッスンの目的
このレッスンを修了すると、AppMap を使用してナビゲーション レイアウトをデザインする方法を理解できるようになります。
- AppMap プロジェクトの作成
- AppMap デザインの作成
- ナビゲーションの構築とテスト
ステップ 1プロジェクトの設定
まず、Infragistics AppMap と Infragistics Toolbox がインストールされていることを確認します。Visual Studio で、[ツール] をクリックし、[拡張機能と更新プログラム] をクリックします。AppMap と Toolbox がリストされ、有効になっている必要があります。
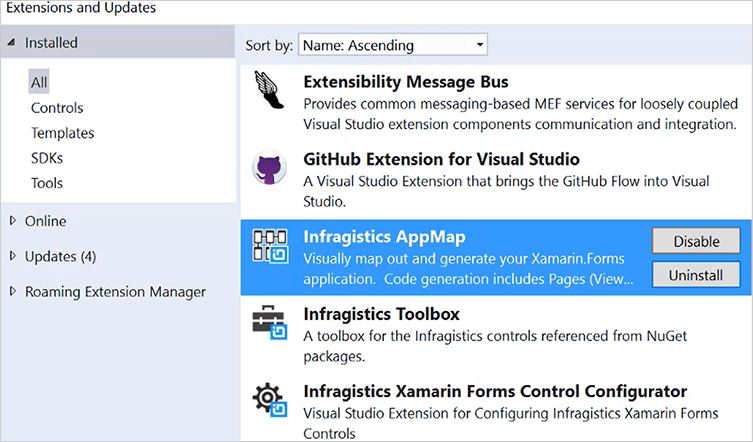
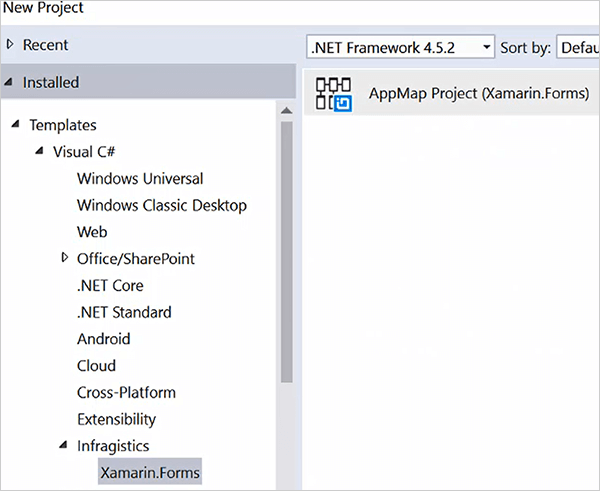
確認したら、[拡張機能と更新] ウィンドウを閉じます。Visual Studio のホームページで、[プロジェクト テンプレートの参照] をクリックします。[参照] ウィンドウで [Infragistics] を展開し、[Xamarin.Forms] をクリックします。AppMap プロジェクトを選択し、[OK]をクリックします。
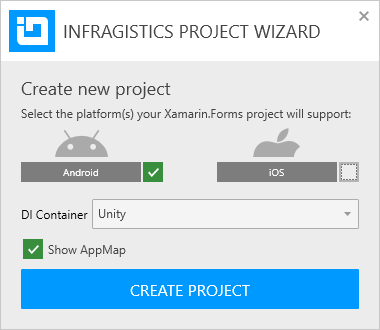
[新しいプロジェクトの作成] ウィンドウが表示され、プロジェクトのプラットフォームを選択するように求められます。デモンストレーションの目的で、Androidのみを使用します。[iOS] のチェックを外し、[Android] が選択されていることを確認します。Prismで必要なDIコンテナをUnityに設定し、AppMapの表示を有効にする必要があります。[プロジェクトの作成] をクリックします。
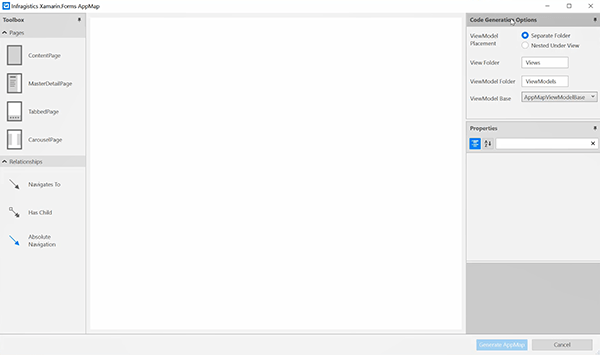
空白の AppMap には、AppMap で使用される使用可能なページ、リレーションシップ、プロパティ、およびコード生成オプションが表示されます。
ステップ 2 AppMap フローの設計
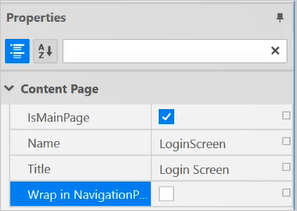
まず、ツールボックスからデザイン領域に ContentPage をドラッグ アンド ドロップします。最初の ContentPage 要素のタイトルは MainPage です。ページが実際にメインページであるかどうかは、[プロパティ]メニューで制御します。[名前] を「LoginScreen」に変更し、[Wrap in Navigation] チェックボックスをオフにします。
ツールボックスから別のContentPage要素を既存のページの右側にドラッグ アンド ドロップします。「ナビゲート先」リレーションをドラッグ・アンド・ドロップして、LoginScreenページを新しいページに接続します。新しいページの名前を NewAccountScreen に変更します。
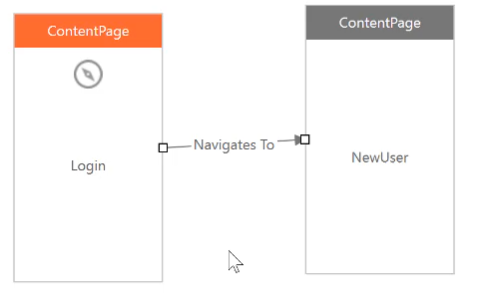
これは、アプリのメインページで新しいアカウントを作成するように求められた場合に便利です。別の Navigates To 要素をドラッグ アンド ドロップして、NewAccountScreen から LoginScreen に戻り、逆方向のナビゲーションを行います。既存の [移動先] 要素の上に要素をドラッグして、両方向を指す矢印が表示されるようにします。

[移動先] 要素を選択した状態で、使用可能なプロパティを確認します。MasterDetailPage 要素をデザイン領域にドラッグ アンド ドロップし、要素に MainPage という名前を付けます。ページの種類によって、追加のコンテンツ ページが自動的に作成されることに注意してください。また、各ページでは、ナビゲーションアイコンで示されるように、ナビゲーションが自動的に有効になります。これにより、ページがハンバーガーのナビゲーションメニューに自動的に含まれるようになります。MasterDetailPage の名前を Home に変更し、リンクされたページの名前を Customers, Orders, and NewsFeed に変更します。
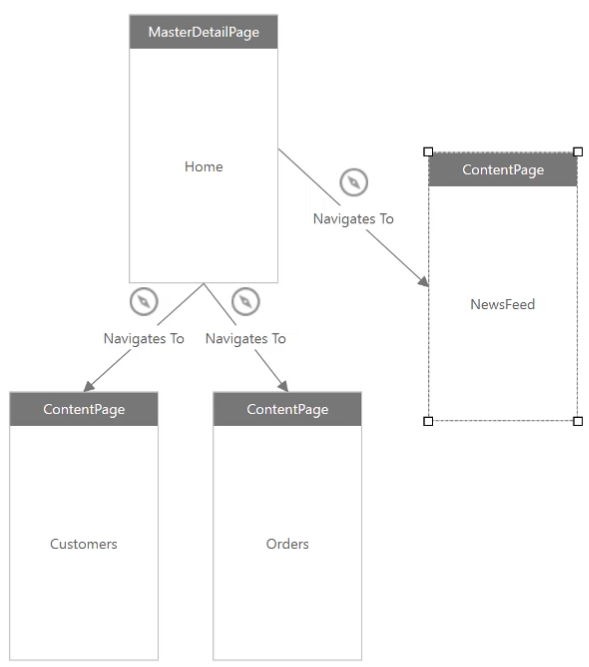
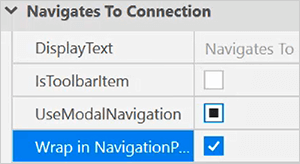
ナビゲーション設定を表示するには、新しい [移動先] 要素の 1 つを選択します。NavigatonPage の折り返しは、子ページで自動的に有効になります。
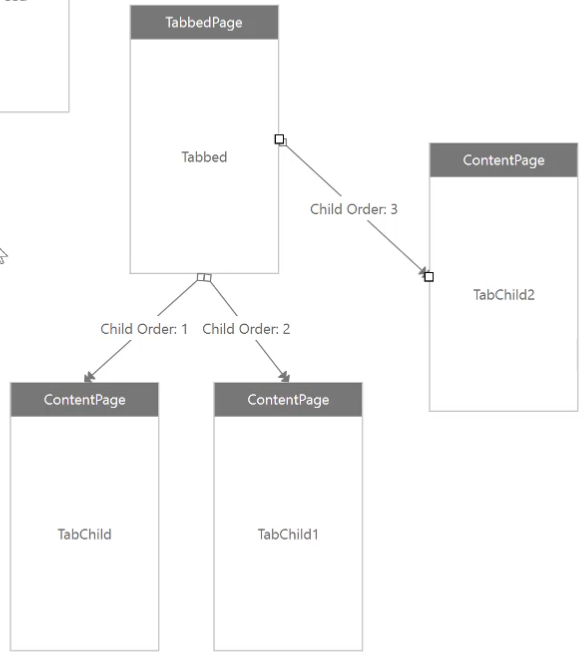
TabbedPage 要素を Home 要素の右側にドラッグ アンド ドロップします。追加のコンテンツ ページが追加され、今回は番号付きの子ページとして追加されていることに注意してください。また、Navigates To 要素を使用して、コンテンツ ページからタブ付きページに直接移動することもできます。ツールボックスから [移動先] 要素をドラッグします。ソースを [オーダー] に接続し、宛先を [タブ付き] に接続します。
CustomerDetails ページの下に、さらに 2 つのコンテンツ ページを追加します。ページに「Sales and Employees」という名前を付けます。Has Child リレーション要素を使用して、CustomerDetails ページを各コンテンツ ページに接続します。要素のプロパティを使用して、Sales 注文が 0 に設定され、Employees 注文が 1 に設定されていることを確認します。
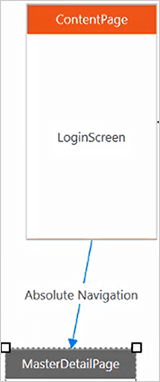
パズルの最後のピースとして、LoginScreen コンテンツ ページから MasterDetailPage に Absolute Navigation リレーションシップ要素をドラッグ アンド ドロップします。これにより、ログイン画面から MasterDetailpage への一方向のパスが提供され、ログイン画面に戻る方法はありません。
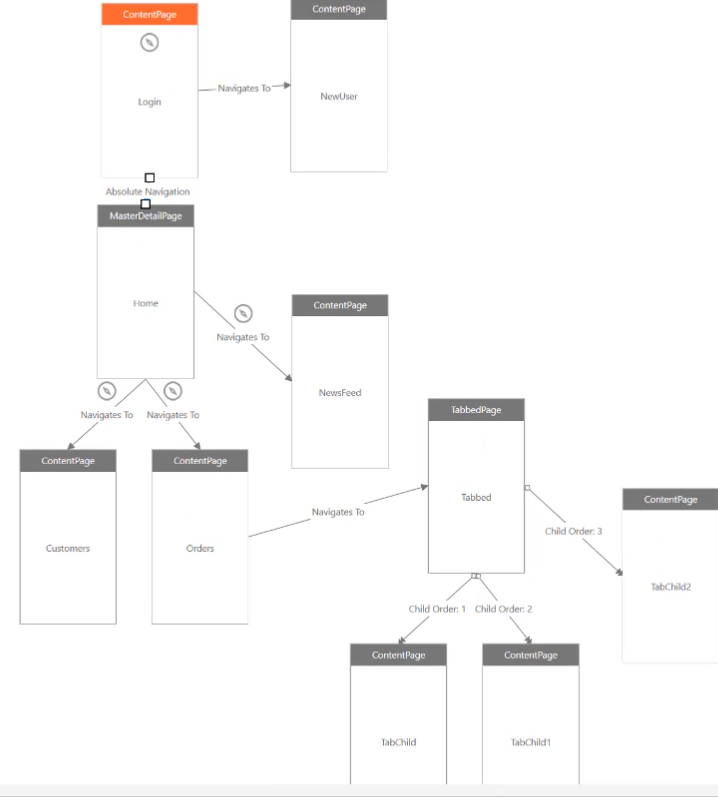
デザイン全体を見直して、各ページをステップ実行するロジックと各ページのナビゲーション オプションを理解します。関連付けられたコードを作成する準備ができたら、[Generate AppMap] をクリックします。
プロジェクトは、AppMap で作成されたデザインをサポートするために必要なすべてのファイルを使用して作成されます。
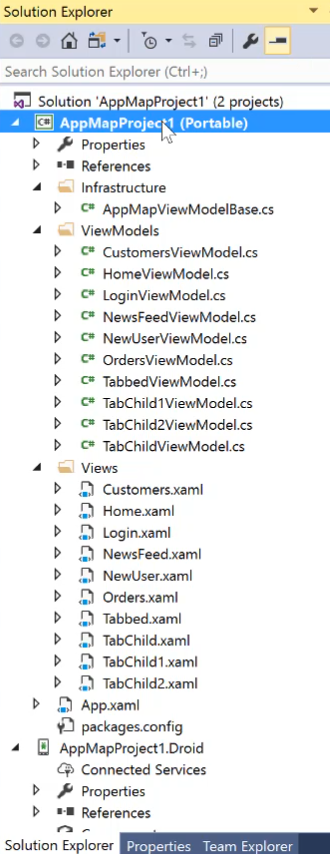
ビュー モデルと XAML を参照して、使用したデザインに基づいて AppMap が必要な Prism コードと XAML をどのように作成したかを確認します。
探索した後、Android パッケージを右クリックし、[StartUpProject として設定] をクリックします。

プロジェクトを右クリックし、[ビルド]をクリックします。ビルドが完了したら、目的のエミュレータまたはハードウェア デバイスを使用してプロジェクトを実行します。
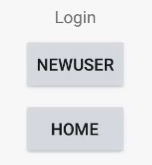
「MainPage」をクリックして、「CustomerLi」ページに移動します。画面の左上にあるハンバーガー メニュー アイコンに注目してください。メニューをクリックして、AppMap で定義したコンテンツ ページを表示します。

CustomersList ページに移動すると、子オブジェクトを含むタブ付きページが表示されます。タブ間をクリックして、アプリ内のページを切り替えます。

結論
Infragistics Ultimate UI for Xamarinには、ナビゲーション要素を視覚的にデザインするための AppMap が含まれています。必要な要素をドラッグしてロップし、わずか数分で数十ページの完全なナビゲーションメニューシステムを作成できます。すべてのコンテンツ ページでは、ベスト プラクティスの Prism と XAML コードが生成されます。
