xmlns:igDP="http://infragistics.com/DataPresenter"

Report オブジェクトをインスタンス化して EmbeddedVisualReportSection オブジェクトをその Sections コレクションに追加してからでなければ、レポートをプレビュー、印刷、またはエクスポートすることはできません。セクションを Report オブジェクトに追加した後で、xamReportPreview™ コントロールを使用してレポートの 印刷プレビューを表示したり、XML Paper Specification (XPS) 形式でレポートをエクスポートしたり、レポートをプリンタに出力することができます。
主要コンテンツとして xamDataGrid™ を使用してレポートを作成します。
xamReportPreview をウィンドウに追加します。
Microsoft® Windows® Presentation Foundation Window プロジェクトを作成します。
ソリューション エクスプローラーで次の参照をプロジェクトに追加します。
アプリケーションにレポート機能を実装するために必要なのは、リストにある最初の 2 つのアセンブリへの参照だけです。このトピックの後半でレポート機能を例示するために xamDataGrid コントロールが使用されます。
InfragisticsWPF4.v20.1.dll
InfragisticsWPF4.Reporting.v20.1.dll
InfragisticsWPF4.DataPresenter.v20.1.dll
InfragisticsWPF4.Editors.v20.1.dll
開いている Window タグ内で xamDataGrid の名前空間宣言を追加します。
XAML の場合:
xmlns:igDP="http://infragistics.com/DataPresenter"
DockPanel コンテナーを Window に追加します。
XAML の場合:
<DockPanel>
    <!--TODO: ここに Button を追加します。-->
    <!--TODO: ここに xamDataGrid を追加します。-->
</DockPanel>
Button コントロールを DockPanel コンテナーに追加します。
添付の DockPanel.Dock プロパティを Top に設定します。
Content プロパティを "Print xamDataGrid" に設定します。
Button コントロールの Click イベントにイベント ハンドラーを接続します。
XAML の場合:
<Button
    DockPanel.Dock="Top"
    Content="Print xamDataGrid"
    Click="Button_Click" />
xamDataGrid を DockPanel コンテナーに追加します。
Name プロパティを設定すると、コード ビハインドで参照できます。
BindToSampleData プロパティを True に設定します。
XAML の場合:
<igDP:XamDataGrid Name="xamDataGrid1" BindToSampleData="True" />
コード ビハインドを開き、コード ビハインド内に using/Imports のディレクティブを配置すれば、メンバーの完全に記述された名前を常にタイプする必要がなくなります。
Visual Basic の場合:
Imports Infragistics.Windows.Reporting
C# の場合:
using Infragistics.Windows.Reporting;
Visual Basic の場合:
Private Sub Button_Click(sender As Object, e As RoutedEventArgs)
    Dim report1 As New Report()
    Dim section1 As New EmbeddedVisualReportSection(Me.xamDataGrid1)
    report1.Sections.Add(section1)
    report1.Print()
    ' 以下のコード行は、xamDataGrid のコンテンツを
    ' XPS ドキュメントにエクスポートします。
    'report1.Export(OutputFormat.XPS, "c:\\xamDataGrid1.xps")
End Sub
C# の場合:
private void Button_Click(object sender, RoutedEventArgs e)
{
    Report report1 = new Report();
    EmbeddedVisualReportSection section1 = new EmbeddedVisualReportSection(this.xamDataGrid1);
    report1.Sections.Add(section1);
    report1.Print();
    // 以下のコード行は、xamDataGrid のコンテンツを
    // XPS ドキュメントにエクスポートします。
    //report1.Export(OutputFormat.XPS, "c:\\xamDataGrid1.xps");
}
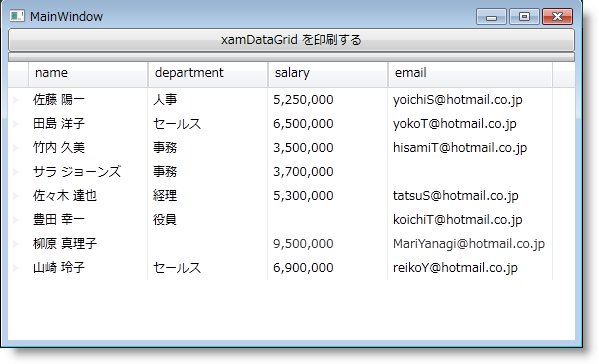
プロジェクトを実行します。
以下のスクリーンショットのような Window が表示されます。"Print xamDataGrid" とラベルが付けられたボタンをクリックして、xamDataGrid コントロールのコンテンツを印刷できます。
Microsoft® Windows® Presentation Foundation Window プロジェクトを作成します。
ソリューション エクスプローラーで次の参照を追加します。
InfragisticsWPF4.v20.1.dll
InfragisticsWPF4.Reporting.v20.1.dll
Infragistics 名前空間宣言を追加します
XAML の場合:
xmlns:igReporting="http://infragistics.com/Reporting"
Visual Basic の場合:
Imports Infragistics.Windows.Reporting
C# の場合:
using Infragistics.Windows.Reporting;
デフォルトの Grid レイアウト コンテナーに名前を付けると、コード ビハインドで参照できます。
XAML の場合:
<Grid Name="layoutRoot">
</Grid>
コード ビハインドを使用する場合、Window の Loaded イベントにイベント ハンドラーを接続します。
XAML の場合:
<Window ... Loaded="Window_Loaded">
xamReportPreview コントロールのインスタンスを作成して、これをメイン Grid に追加します。
XAML の場合:
<igReporting:XamReportPreview Name="xamReportPreview1" />
Visual Basic の場合:
Private Sub Window_Loaded(ByVal sender As Object, ByVal e As RoutedEventArgs)
    Dim xamReportPreview1 = New XamReportPreview()
    Me.layoutRoot.Children.Add(xamReportPreview1)
End Sub
C# の場合:
private void Window_Loaded(object sender, RoutedEventArgs e)
{
    XamReportPreview xamReportPreview1 = new XamReportPreview();
    this.layoutRoot.Children.Add(xamReportPreview1);
}
プロジェクトを実行します。
プロジェクトを実行すると、以下のスクリーンショットに似た Window が表示されます。xamReportPreview コントロールは、レポートのプレビューを生成していないために、コンテンツを表示しません。xamReportPreview の GeneratePreview メソッドを呼び出し、 Report オブジェクトに参照を渡す必要があります。
