Imports Infragistics.WebUI.WebSchedule

Web アプリケーションで WebSchedule を使用する場合、ユーザーがログオンして固有のアクティビティを表示または編集できるようにするために使用するのが一般的です。この詳細なガイドは、WebSchedule アプリケーションのログオンダイアログの単純な例を作成します。
この詳細なガイドを開始する前に、WebSchedule のリソースの概念をよく理解しておくべきです。またデフォルトの「未割り当ての」リソース以外のいくつかの リソース をすでに追加しておく必要があります。Web フォーム上の WebScheduleInfo を WebSchedule データベースに有効に接続する必要があります。
コードの記述を開始する前にコード ビハインドに using/imports のディレクティブを配置します。そうすれば、メンバは完全に記述された名前を常に入力する必要がなくなります。
Visual Basic の場合:
Imports Infragistics.WebUI.WebSchedule
C# の場合:
using Infragistics.WebUI.WebSchedule;
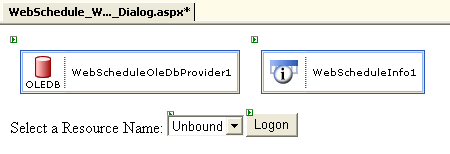
DropDownList とボタンをログオン ページに追加します。
Web アプリケーションによって異なりますが、ユーザー名を入力するための TextBox がより適しています。さらに必要であればパスワード入力用の別の TextBox も適しています。しかし、最大限に簡単にするために、この例では DropDownList を使用して、リソースとしてユーザーがログオンできるようにします。
コードを使用して、リソース名を DropDownList に格納します。
このコードは Page.Load イベント ハンドラに追加できます。
Visual Basic の場合:
Private Sub Page_Load(ByVal sender As Object, ByVal e As EventArgs) Handles MyBase.Load
        If Not Me.IsPostBack Then
                Dim resources As ICollection = Me.WebScheduleOleDbProvider1.FetchResources()
                If Not resources Is Nothing Then
                        Dim currentResource As Resource
                        For Each currentResource In resources
                                Me.resourceList.Items.Add(currentResource.Name)
                        Next
                End If
        End If
End Sub
C# の場合:
private void Page_Load(object sender, System.EventArgs e)
{
        if (!this.IsPostBack)
        {
                ICollection resources = this.WebScheduleOleDbProvider1.FetchResources();
                if (resources != null)
                {
                        foreach (Resource currentResource in resources)
                        {
                                this.resourceList.Items.Add(currentResource.Name);
                        }
                }
        }
}
コードを追加してログオンボタンの Click イベントを処理します。
ユーザーがログオン ボタンをクリックすると、DropDownList で選択した値を次のページに渡す必要があります。これを実行するための最もシンプルで最も信頼性の高い方法は、querystring を使用することです。
Visual Basic の場合:
Private Sub logonButton_Click(ByVal sender As Object, _
  ByVal e As System.EventArgs) Handles logonButton.Click
        Me.Response.Redirect("Destination.aspx?resourceName=" + Me.resourceList.SelectedItem.Text)
End Sub
C# の場合:
private void logonButton_Click(object sender, System.EventArgs e)
{
        this.Response.Redirect("Destination.aspx?resourceName=" + this.resourceList.SelectedItem.Text);
}
コードを追加して、WebScheduleInfo の ActiveResourceName プロパティを設定します。
ユーザーを次のページ(Destination.aspx)にリダイレクトされます。次のページはひとつまたは複数の WebSchedule View コントロールを含みます。このページは前の手順で渡された querystring を評価し、WebScheduleInfo オブジェクトの ActiveResourceName プロパティを設定します。
Visual Basic の場合:
Private Sub Page_Load(ByVal sender As System.Object, ByVal e As System.EventArgs) Handles MyBase.Load
        If Not Me.IsPostBack Then
                Dim currentResourceName As String = Me.Request.QueryString("resourceName")
                If Not currentResourceName Is Nothing Then
                        Me.WebScheduleInfo1.ActiveResourceName = currentResourceName
                End If
        End If
End Sub
C# の場合:
private void Page_Load(object sender, System.EventArgs e)
{
        if (!this.IsPostBack)
        {
                string currentResourceName = this.Request.QueryString["resourceName"];
                if (currentResourceName != null)
                {
                        this.WebScheduleInfo1.ActiveResourceName = currentResourceName;
                }
        }
}
WebSchedule View コントロールを使用して、宛先ページにリダイレクトされる前にエンド ユーザーがリソースを選択することができるログオン ページを作成しました。選択したリソース名を渡すために query 文字列を使用し、これを使用して宛先ページで ActiveResourceName プロパティを選択しました。