Ignite UI for React と Next.js の統合
Ignite UI for React を Next.js プロジェクトにシームレスに統合する方法について説明します。このトピックは、開発者が堅牢でパフォーマンスの高いフル スタック アプリケーションを構築するために Next.js の機能を活用しながら、Infragistics React コンポーネントを最大限に活用できるように作成されています。
前提条件
- NodeJS をインストールします。
- Visual Studio Code をインストールします。
新しい Next.js プロジェクトの作成
前提条件のインストール後、新しい Next.js アプリケーションを作成できます。
1 - VS Code を開き、[ターミナル] メニューを選択してから、[新しいターミナル] オプションを選択します。
2 - ターミナル ウィンドウに以下のコマンドを入力します。
npx create-next-app@latest MyAppName
cd MyAppName
既存の Next.js アプリの更新
既存の Next.js プロジェクト(既に以前に作成したもの) で Ignite UI for React を使用する場合は、以下のコマンドを実行するだけです。
npm install --save igniteui-react
npm install --save igniteui-react-charts igniteui-react-core
npm install --save igniteui-react-excel igniteui-react-core
npm install --save igniteui-react-gauges igniteui-react-core
npm install --save igniteui-react-grids igniteui-react-core
npm install --save igniteui-react-maps igniteui-react-core
npm install --save igniteui-react-spreadsheet igniteui-react-core
または
yarn add igniteui-react-charts igniteui-react-core
yarn add igniteui-react-excel igniteui-react-core
yarn add igniteui-react-gauges igniteui-react-core
yarn add igniteui-react-grids igniteui-react-core
yarn add igniteui-react-maps igniteui-react-core
yarn add igniteui-react-spreadsheet igniteui-react-core
これにより、Ignite UI for React のパッケージが、それらのすべての依存関係、フォントのインポート、および既存のプロジェクトへのスタイル参照と共に自動的にインストールされます。
コンポーネント モジュールのインポート
はじめに、使いたいコンポーネントの必要なモジュールをインポートします。GeographicMap コンポーネントに対してこれを行います。
"use client"
import { IgrGeographicMapModule, IgrGeographicMap } from 'igniteui-react-maps';
import { IgrDataChartInteractivityModule } from 'igniteui-react-charts';

IgrGeographicMapModule.register();
IgrDataChartInteractivityModule.register();
[!Note] Ignite UI for React コンポーネントは、状態やブラウザー イベントなどのクライアント専用の機能を使用していることに注意してください。Infragistics のコンポーネントは、「use client」 ディレクティブがあるため、クライアント Next.js コンポーネント内では期待どおりに動作しますが、サーバー コンポーネント内では動作しません。
コンポーネントの使用
Next.js に Ignite UI for React マップ コンポーネントを使用する準備が整いました。以下のように定義します。
function App() {
  return (
    <div style={{ height: "100%", width: "100%" }}>
      <IgrGeographicMap
        width="800px"
        height="500px"
        zoomable="true" />
    </div>
  );
}
アプリケーションの実行
以下のコマンドを使用して新しいアプリケーションを実行できます。
npm run dev
コマンドを実行した後、プロジェクトがローカルでビルドされて提供されます。これでデフォルトのブラウザーで自動的に開き、プロジェクトで Ignite UI for React コンポーネントを使用できるようになります。
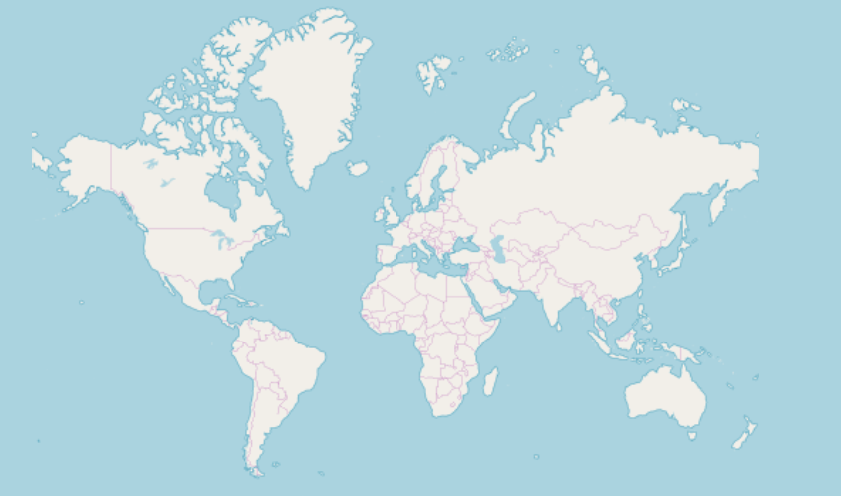
以下の画像は、上記を実行した結果です。

Next.js サーバー コンポーネントでの React の使用
上記に記述した通り、React のほとんどのコンポーネントは状態とブラウザー イベントに依存しているため、サーバー コンポーネント内での直接使用と互換性がありません。ですが、サーバーコンポーネント内で使用する必要がある場合は、Infragistics のコンポーネントをそれぞれのクライアント コンポーネント内にラップすることができます。
'use client'
import { IgrGeographicMap } from 'igniteui-react-maps';
IgrGeographicMapModule.register();

export default IgrGeographicMap;
そのようにすることで、Next.js サーバー コンポーネントで IgrGeographicMap を直接使用できます。
import IgrGeographicMap from './wrapped-geographic-map';

function App() {
  return (
    <div style={{ height: "100%", width: "100%" }}>
      <IgrGeographicMap
        width="800px"
        height="500px"
        zoomable="true" />
    </div>
  );
}
[!Note] Ignite UI for React コンポーネントの大部分は、他のクライアント コンポーネント内で使用されることが予想されるため、ラップされていないままになる可能性があります。したがって、Infragistics コントロールをラップする必要はありません。
Ignite UI for React コンポーネントの動的インポート
アプリケーションの初期読み込みパフォーマンスの向上は、遅延読み込みによって促進されます。これにより、ルートをレンダリングするために必要な JavaScript の量が削減されます。インポートされたライブラリの読み込みを延期し、必要な場合にのみクライアント バンドルに含めることができます。next/dynamic を使用すると、遅延読み込みを実装できます。
"use client";
import "igniteui-webcomponents/themes/light/bootstrap.css";
import dynamic from "next/dynamic";

export default function DynamicButtonComponent() {
  const IgButton = dynamic(
    async () => {
      const { IgrButton, IgrButtonModule } = await import("igniteui-react");
      IgrButtonModule.register();
      return IgrButton;
    }
  );

  return (
      <IgButton variant="contained">
        <span key="title">Click me</span>
      </IgButton>
  );
}
ただし、より複雑なコンポーネント (通常は子コンポーネントを含む IgrGrid など) を使用する場合は、すべての子コンポーネントを動的にインポートしないことが重要です。コンポーネントは次のように使用する必要があります。
"use client";
import dynamic from "next/dynamic";
import CustomersDataLocal from "./CustomersDataLocal.json";
import "igniteui-react-grids/grids/combined";
import "igniteui-react-grids/grids/themes/light/bootstrap.css";

export default function GridDynamicComponent() {
  const IgnGrid = dynamic(
    async () => {
      const {
        IgrGrid,
        IgrGridModule,
        IgrColumn,
        IgrGridToolbar,
        IgrGridToolbarTitle,
        IgrGridToolbarActions,
        IgrGridToolbarPinning,
      } = await import("igniteui-react-grids");
      IgrGridModule.register();

      const IgGrid = ({ ...props }) => {
        return (
          <IgrGrid {...props}>
            <IgrGridToolbar>
              <IgrGridToolbarTitle></IgrGridToolbarTitle>
              <IgrGridToolbarActions>
                <IgrGridToolbarPinning></IgrGridToolbarPinning>
              </IgrGridToolbarActions>
            </IgrGridToolbar>
            <IgrColumn field="ID" header="ID" hidden="true"></IgrColumn>
            <IgrColumn
              field="CompanyName"
              header="Company Name"
              width="300px"
            ></IgrColumn>
            <IgrColumn
              field="ContactName"
              header="Contact Name"
              width="200px"
              pinned="true"
            ></IgrColumn>
            <IgrColumn
              field="ContactTitle"
              header="Contact Title"
              width="200px"
              pinned="true"
            ></IgrColumn>
            <IgrColumn
              field="Address"
              header="Address"
              width="300px"
            ></IgrColumn>
            <IgrColumn field="City" header="City" width="120px"></IgrColumn>
            <IgrColumn field="Region" header="Region" width="120px"></IgrColumn>
            <IgrColumn
              field="PostalCode"
              header="Postal Code"
              width="150px"
            ></IgrColumn>
            <IgrColumn field="Phone" header="Phone" width="150px"></IgrColumn>
            <IgrColumn field="Fax" header="Fax" width="150px"></IgrColumn>
          </IgrGrid>
        );
      };
      return IgGrid;
    }
  );

  return <IgnGrid data={CustomersDataLocal}></IgnGrid>;
}
[!Note] コンポーネントの遅延読み込みを実装するとパフォーマンスが向上しますが、コンポーネントがページ上にすぐに表示されない場合にのみ使用することをお勧めします。
制限
- Next.js プロジェクトでページ ルーティングを使用している場合は、
next.config.jsオプションを使用して Ignite UI for React パッケージをトランスパイルする必要があります。設定には次の内容が含まれている必要があります。
const nextConfig = {
    transpilePackages: ['igniteui-react'],
    experimental: {
        esmExternals: "loose",
    }
}
その他のリソース
コミュニティに参加して新しいアイデアをご提案ください。

