このトピックでは、XamScheduler コントロールを使用して作業を開始する方法に関する情報を提供します。
以下の手順は、単一の予定を表示する XamScheduler をページに追加する方法を説明します。
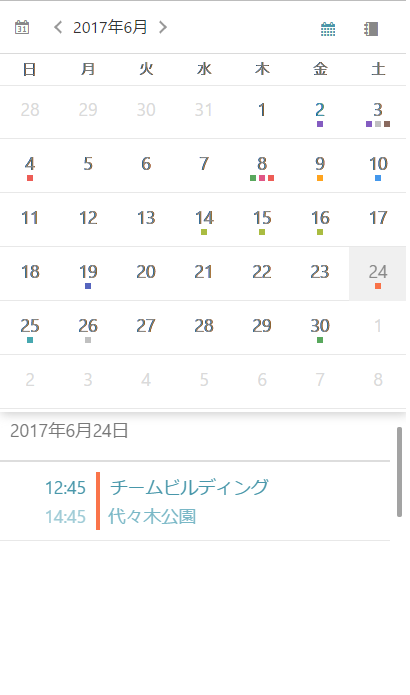
以下の画像は結果のプレビューです。

Xamarin.Forms アプリケーション プロジェクトを作成します。
新しい Forms コンテンツ ページ XAML を作成します。
ページの XAML で、以下の名前空間を追加します。
XAML の場合:
xmlns:igScheduler="clr-namespace:Infragistics.XamarinForms.Controls.Scheduler;assembly=Infragistics.XF.Scheduler"コンテンツ グリッドで XamScheduler の定義を追加します。
XAML の場合:
<Grid>
    <igScheduler:XamScheduler x:Name="scheduler" />
</Grid>
ページのコードビハインドを開いて以下の名前空間を追加します。
C# の場合:
using Infragistics.Scheduler;
using Infragistics.XamarinForms.Controls.Scheduler;
XamScheduler のアクティビティを生成するプライベート メソッドを作成します。
C# の場合:
private void PopulateActivities()
{
    DateTime today = DateTime.Now.Date;

    // Create an appointment
    Appointment appointment1 = new Appointment();
    appointment1.Subject = "Team Meeting";
    appointment1.Location = "Conf. Room #3";
    appointment1.Start = new DateTime(today.Year, today.Month, today.Day, 10, 0, 0);
    appointment1.End = new DateTime(today.Year, today.Month, today.Day, 10, 30, 0);


    // Create a list of appointment
    ObservableCollection<Appointment> appointments = new ObservableCollection<Appointment>();
    appointments.Add(appointment1);

    // Create a ScheduleListDataSource instance
    ScheduleListDataSource dataSource = new ScheduleListDataSource();
    dataSource.AppointmentItemsSource = appointments;

    // Set the data source to the control
    this.scheduler.DataSource = dataSource;
}
以前の手順で定義されるメソッドをページのコンストラクターで InitializeComponent() 呼び出しの後に起動します。
C# の場合:
PopulateActivities();アプリケーションをビルド、配備、および実行します。